In a previous entry, same upgrade was implemented using export/import devices, but we will work now performing the same upgrade but now using a migration backup in ADS v3.3 and restoring it in ADS v4.0, this is my preferred was as all settings and administration tasks (scheduled backups and other settings) are included in the migration backup.
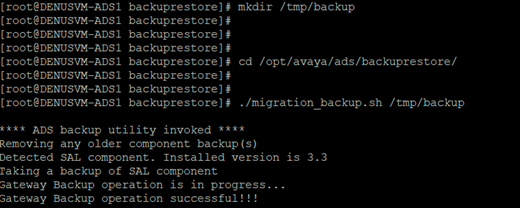
The first step is create the migration backup in ADS v3.3 using the following commands:
mkdir /tmp/backup <- create a folder to save the backup file
cd /opt/avaya/ads/backuprestore <- move to the script folder used for the backup
./migration_backup.sh /tmp/backup <- create a migration backup file in the folder created in the first step
Verify the result backup file created with the following command:
ls -ltr /tmp/backup

The next step is to download the file to your PC which will be used in the next steps.
Deploy the OVA for version 4.0, it’s important to note that this deploy will only install the OS required, ADS software needs to be installed and configured.
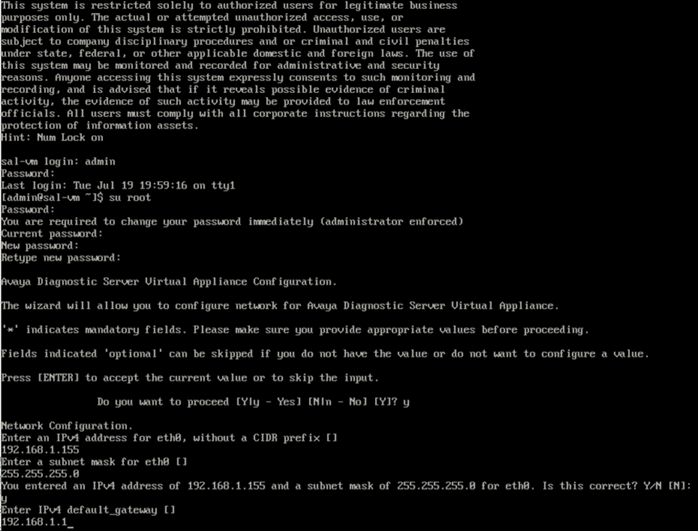
After VM is installed try log in into the new ADS v4.0 using the default passwords.
You will be forced to change the default password for admin (admin01) and root (root01) users in ADS OS after first login.
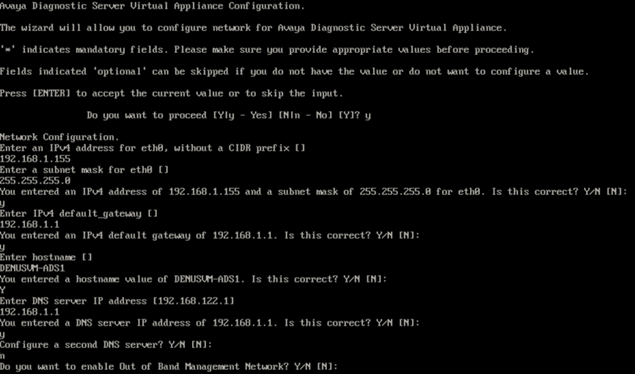
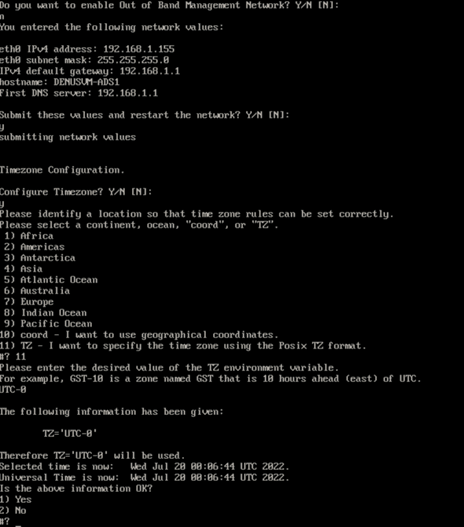
As soon as you change the root password, ADS wizard runs by default, it will require default information for OS (hostname, IP, mask, gateway, DNS and timezone).
Make sure old ADS v3.3 is turned off before you take same the IP address to avoid duplicated IP address in your network.
At this point ADS is now available in the network.
Upload the migration backup file created at the beginning of this document into ADS v4.0 (you can use any SFTP client like WinSCP) in this case file was uploaded in /home/admin

Avaya Diagnostic Server comes with GA software installer located in /installer, any updates or service packs needs to be applied after installing the GA software.
In this case only ADS 4.0 will be installed (no Policy Manager will be deployed).
Move to /installer/ and extract the files to start the implementation of the ADS, issue the command:
cd /installer
tar -xvf ADS-Installer-4.0.0.0-843.tar.gz

After extracting, a new folder is now available in the /installer folder, issue the following command to list the folder:
ls -ltr

Move to the new folder, use the following command:
cd ADS-Installer-4.0.0.0-843

When listing all files inside /installer/ADS-Installer-4.0.0.0-843 you will need to modify ADS_Response.properties.
This file is used to run a silent installation of ADS.

Use vi or any other text file editor you feel comfortable.
Modify ADS_Response.properties with the corresponding values
- For the ADS_AGREELICENSE property in the response file, replace the value n with y.
- For the BACKUP_FILE_PATH property, set the value as the full path of the backup file. (include the file name and extension)
- For the AGREE_ADS_COMPONENTS_CORESIDENT property, replace the value n with y, if user is installing both SAL Gateway and SLA Mon.
- For the ADS_COMPONENT_TO_INSTALL property, set the value as 3, if user is installing both SAL Gateway and SLA Mon.

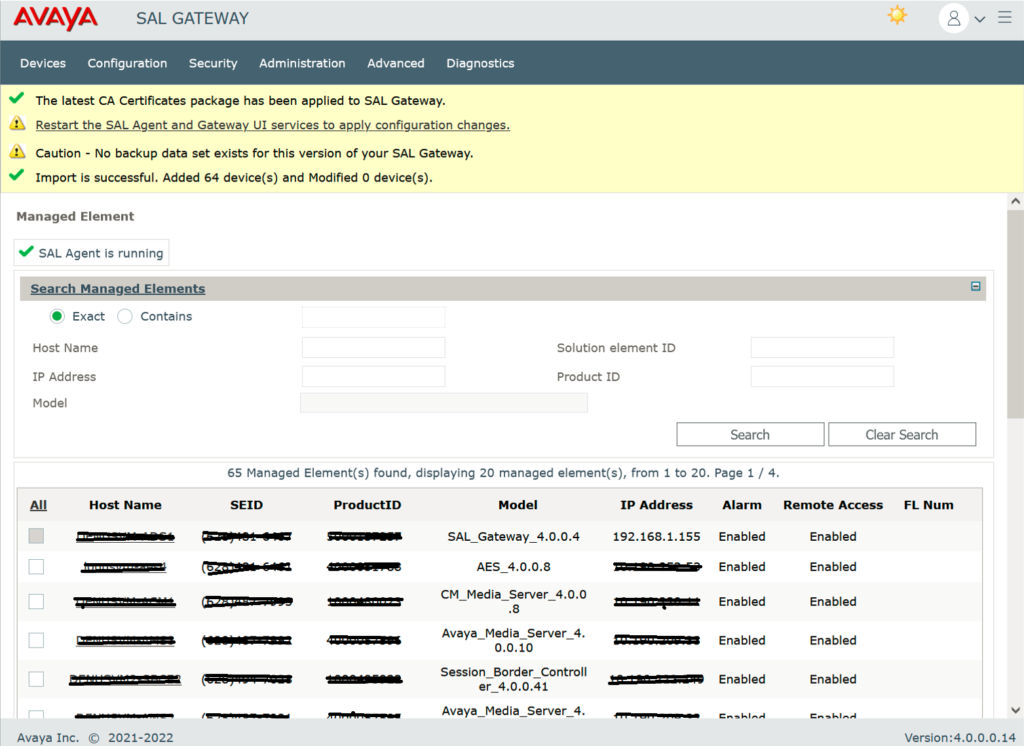
After ADS installation is completed successfully, you should be able to access the web portal for ADS https://IP_Address:7443
Verify all managed devices are loaded correctly.